Roses are red…
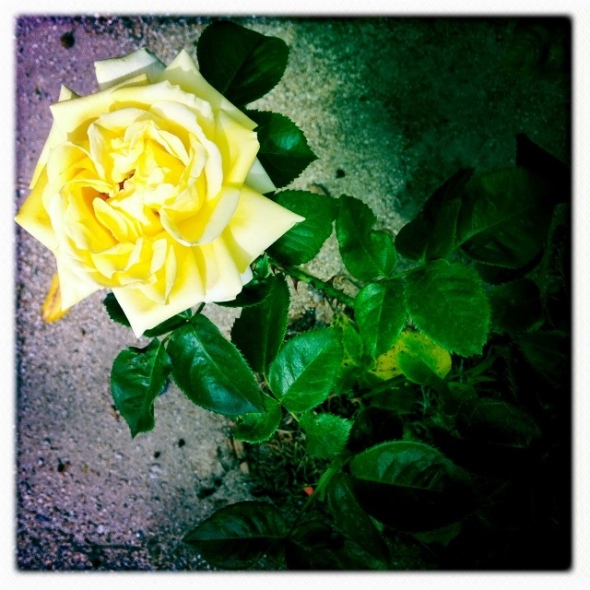
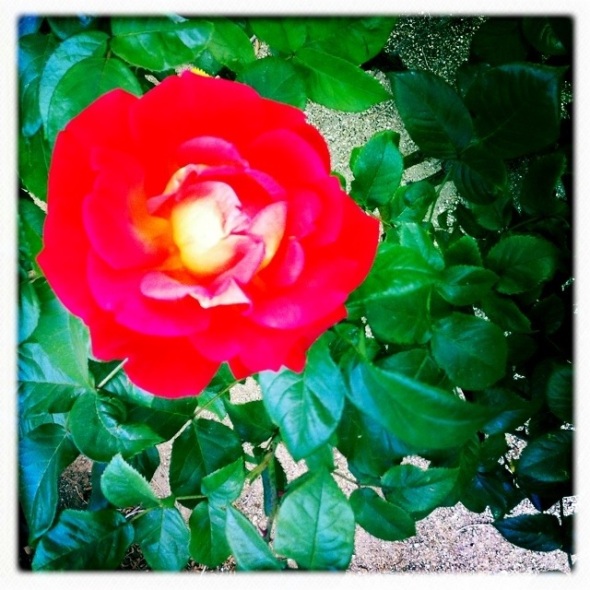
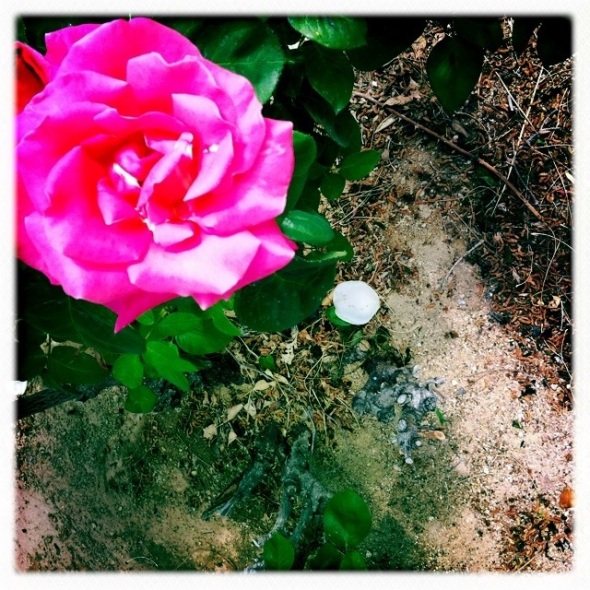
Posted: April 13, 2012 Filed under: garden, Growing Flowers, Uncategorized Leave a commentThis time of year at Bob Baskin Park is especially fun. The weather is perfect, the water features are off so Gadzuki stays dry and the roses are all in full bloom!
Heart of gold.
Posted: April 10, 2012 Filed under: diy garden, garden, Growing Flowers, Landscaping, Uncategorized | Tags: baby tears, Black eyed susan, Cowtown Guitars, Desert, Hearts of Gold, Jesse Amoroso, Las Vegas, Neil Young, Periwinkle, Plant World, roxie amoroso, Shade Garden 1 CommentLike Neil Young himself, I too was searching for a heart of gold. Well… I knew where to find one, it was the financier I was looking for. Found it!
I was rewarded for all of my hard work at the shop with a nice little budget to start re-planting the shade gardens on the NW side of our house. You might remember last year as I tried all kinds of things that ultimately failed (radishes, carrots, spinach) all from seed, all failures. Turned out all we needed was some reliable irrigation and that came in the form of my new gardener Hermino. He’s terrific. Like the little baby jesus delivered me an Angel of Horticulture… but more on Hermino later.
Today, Gadzuki & I went to Plant World to get some things that would be suitable for a partially shady area, wouldn’t mind the encroaching oleanders and could stair step down in 3 tiers. Oh yeah, and it would have to be considerate of the last thing my husband said to me before he left for work… “Don’t cover up the lights.”
Two toddler sized shoes in the turtle pond later, we had what we had come for. The same kid that helped us out to the car with our vegetables yesterday loaded us up and as I was fastening my kid in the carseat I heard him say “Have a great day, Beautiful”. WHAT? I’m almost positive I looked around for another person in the parking lot that he might have been talking to. Now normally I would just take this as a compliment, say if it came from the 60 year old man that had just run my debit card… but for some reason, out of the mouth of a twenty something kid, I’m inclined to roll my eyes and laugh. I know I should just be gracious and go on my merry way… but for what ever reason I can’t. Twenty year old boys are silly, and the idea that this one thought he could flirt with me is some how offensive… I mean, doesn’t he know who my husband is? Ha! (I JOKE!!) Really, they should be used to dealing with celebrities… Nick Cage was there yesterday when we arrived. (Still Joking!! Not about the Nick Cage thing, he was really there… I’m joking about my poor husbands celebrity status.)
Anyway…
Here’s what we got:
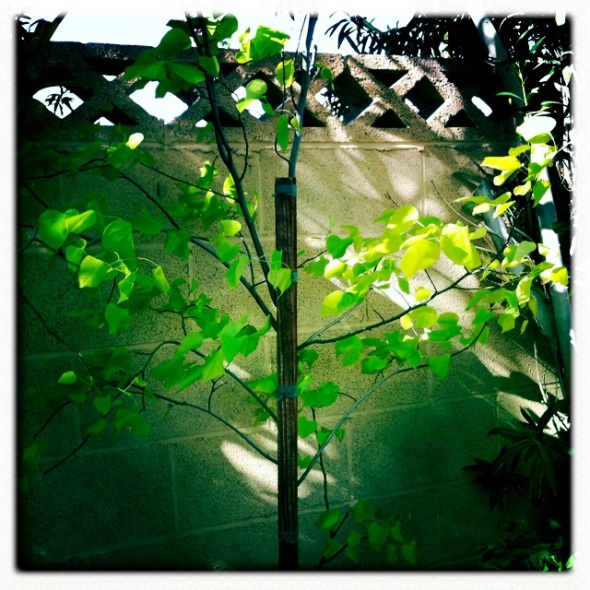
1. A Hearts of Gold Redbud tree. (I’ve been pining over this tree for over a year)
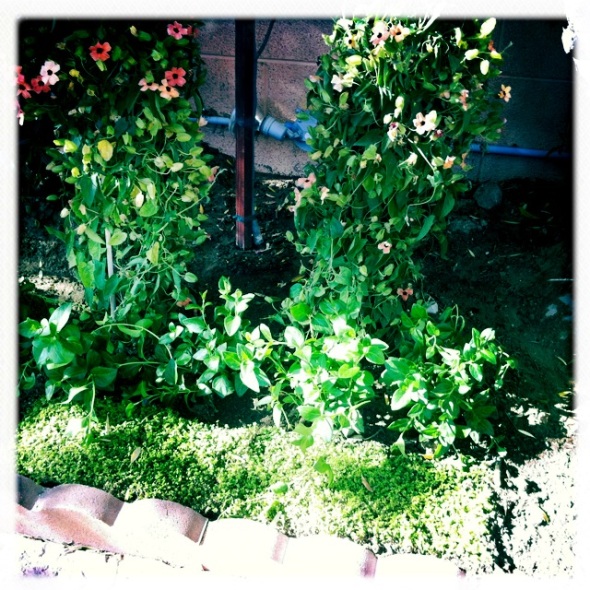
2. 2 Blushing Susie Black-Eyed Susan Vines (because they remind me of my mothers garden)
3. 6 Vinca Major (periwinkle)
4. 1 flat of “baby tears” (ground cover)
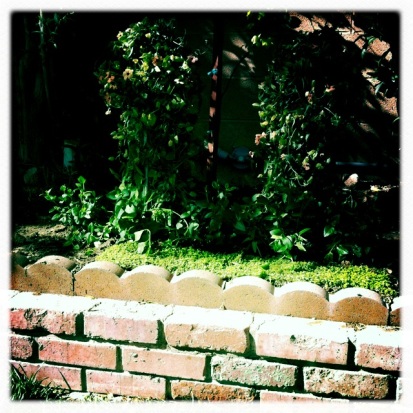
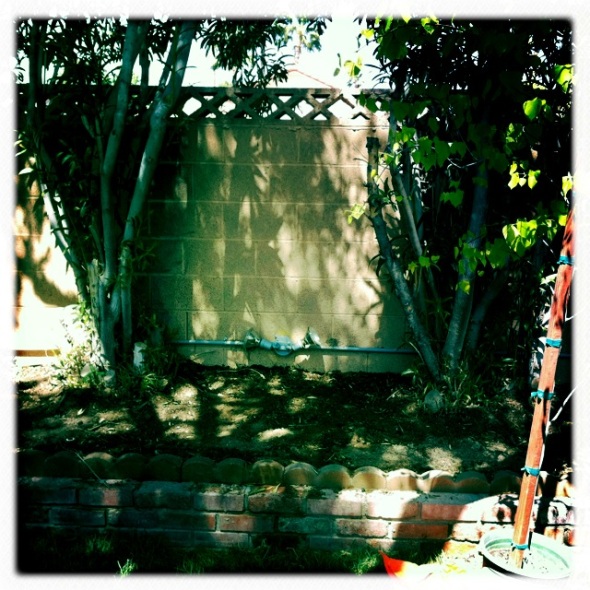
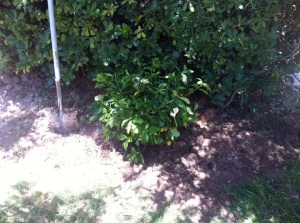
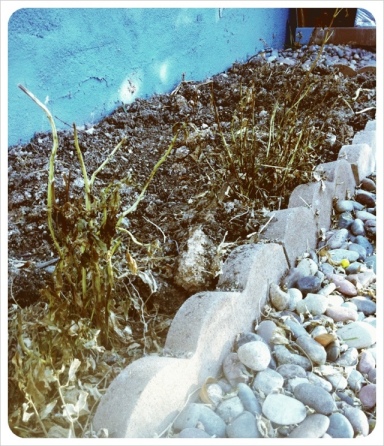
And here are some before and afters:
As you can see… this section of the yard needs a lot of work still, but its nice to know one small chunk is done.
Mama, the baby bee keeper.
Posted: February 29, 2012 Filed under: Uncategorized Leave a commentSome days I garden to spend time with my family, and some days I garden because my husband still hasn’t built the “Roxie sized sound proof box” that I asked for. I’m sure its coming… He has a way of getting me everything my heart desires. Until then, I’ll consider our yard my sound proof zone. And truth be told, he did buy the yard for me. It was a consolation prize that came with our dream house 2 years ago.
Don’t get me wrong. I love my kids. Like, borderline obsessive love them. But sometimes and I’m sure all of you parents can relate… something inside me catches fire and I swear to the little 8 lb baby jesus that if I hear one more “doooooooooon’t!!!!!!!!!!” in a high pitched voice, the rage will consume me and I’ll burst into flame. Literally. I now know how spontaneous combustion happens now. And when I feel the burn I’m lucky enough to have my garden. I quickly exit stage left and grab the first spade I see. The funny thing about it is even on days like this, when I’ve survived the day and after I’ve gotten them all showered, bathed, fed and put to bed… I find my self downstairs on the computer in silence looking at childhood photos of them. Or staring at the little one while he sleeps.
Science is a strange and magical thing. The same mother that brings the bee’s to the blossoms each year is also the mother that designed us so that we can handle so very much and still want to pollinate and carry on our own species… crazy, man. Just crazy.
Thats it for today… I’m going to pick up some free pavers from the neighborhood next to mine for a raised garden!
A surprise gift from a friend.
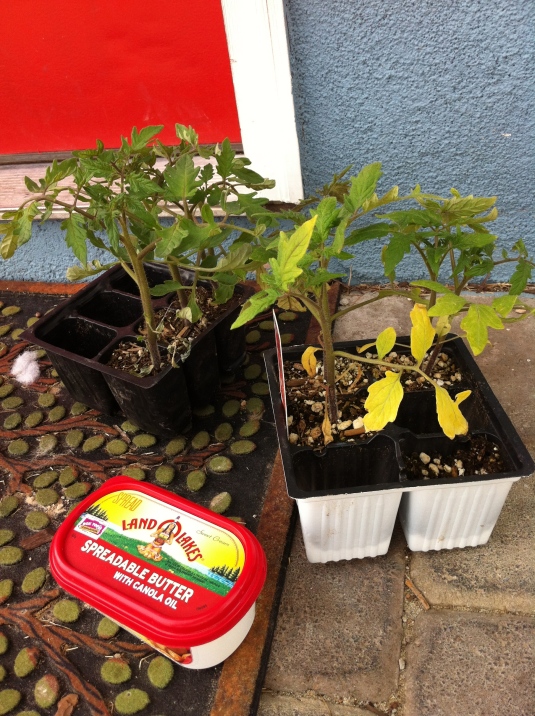
Posted: February 27, 2012 Filed under: diy garden, garden, Growing Tomatoes, Personal, Thoughts on gardening, Uncategorized | Tags: Garden Alive, Gardening, Gifts, Jesse Amoroso, roxie amoroso, Stephanie Henderson, Tomatoes Alive, Veggies Leave a commentThis morning I stumbled to the door bleary eyed and still searching for my lost cup of coffee, to find a gift on my doorstep! My gardening guru and dear friend Stephanie Henderson had left for me, 6 tomato seedlings and a container of her tried and true secret weapon. Butter? No, that was merely the vessel by which the magic traveled.
You dear reader, chose the right day to read my blog. I’m about to share with you the secret for planting your tomatoes early and helping them develop a strong root system (even when the weather is still hovering dangerously close to freezing at night.) Tomatoes Alive! From the website http://www.gardensalive.com is the stuff. According to their web site: “For more than 20 years, gardeners across the country have raved about Tomatoes Alive! Our all-natural fertilizer is a backyard celebrity, famous for producing vigorous plants, big crops and luscious flavor. For Tomatoes Alive! Plus, we’ve added theimportant minerals calcium and magnesium. Tomatoes Alive! Plus is recommended not just for tomatoes but also for peppers and eggplants, which require similar nutrients. Its blend of fast- and slow-release ingredients provides the nourishment your plants need for steady, healthy growth and bountiful crops. With just two feedings a season, your plants will produce more blossoms and set more and larger fruit.”
Stephanie suggests sprinkling Tomatoes Alive in the bottom of the hole before you place the plant. I’ve always just used a little bone meal in the past, so I’m excited to see the difference. If my friend’s Tomatoes are any indication of the success this magic dust can bring to the garden then I’M A BELIEVER!!!!
GOOD LUCK, Gardeners!!
A year in the sh*t!
Posted: February 27, 2012 Filed under: Compost, diy garden, garden, Growing Vegetables, Thoughts on gardening, Uncategorized | Tags: added effort, compost bin, couple weekends, Cowtown Guitars, good soil, Hippies, Jesse Amoroso, kids co, Kids Co-op, Kids Coop, roxie amoroso Leave a commentSo its almost been a year since my brilliant kid helped me turn an old desk on its side and we announced to the family that we would begin collecting their trash for the garden. All in all its been an easy adjustment and well worth the added effort. It helps a lot that we were broke as a joke in the beginning and my gardening habit (see: need for good soil) was costing my husband a small fortune. Its pretty easy to get someone on board with something, even if it goes against their inner most constitution when it saves them money. My husband is not a hippy. Not now, not ever. To him, collecting ones trash and growing your own food in it later, quickly gets thrown in the “Hippy” category and left there for all of eternity. But like I said, we were poor… and composted mulch I was buying at the store was about 3 bucks a bag. And I was buying ten at a time. Our house sits on a large lot and having been a foreclosure when we bought it, well… there was a lot of soil to amend.
From the beginning every member of the family was on board. It was Juniors great idea, Tony always delivered the scraps from the kitchen to the bin after dinner and Gadzuki eats his weight in apples each month… so the cores really did add up. Here was the first post about our compost.
Soon after we got started, Gadzuki’s pre-school The Kids Co-op got a compost bin. Again, Jesse… tolerating my “Hippy” tendencies and being the all around great Dad that he is, volunteered to take the morning off work and put it together. Big Fun! 3.5 hours later the Co-op started its composting program and I’m happy to report that I just recently mulched the gardens with their 2nd round of complete compost! (I am the one lady Kids Co-op Gardening committee).
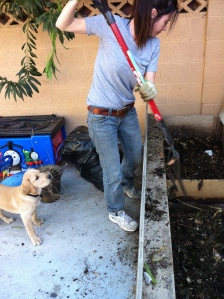
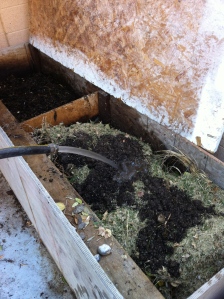
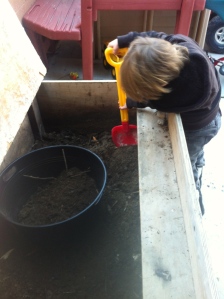
With Spring rearing its head a little early this year, our family has spent the last couple weekends gardening. While it feels so good to get back into the swing of things mentally (my body would have to disagree), I was a little disappointed with my compost. While the one I started mid summer #9 (and damn near forgot about) was completely magical and ready to go, the one that was started just going into fall (#10) was a little lackluster. I’m resisting the urge to put chemicals in it to fire it back up, so here’s what we did:
HOW TO FIRE BACK UP YOUR COMPOST AFTER WINTER!
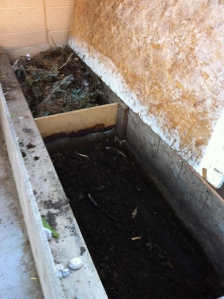
We started by completely cleaning out the finished (and might I add, beautiful) compost – bin number #9. I added it all around the garden and any I had left we put in a planter I know will have veggies soon enough.
After that we split the contents of the left side of the bin (compost #10), I think my mistake was adding a large portion of the Christmas Tree to it back in December… Live and Learn, right?
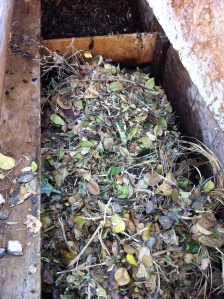
I raked up some leaves (brown)…
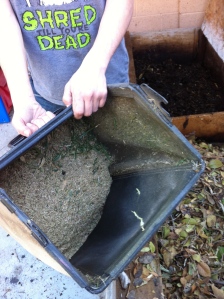
And Junior mowed the lawn (greens)…
We combined them with a little soil and made a delicious compost “Lasagna” as the experts call it.
Water was added and then it was covered. From here on out we will only add to the Right side of the bin, thus turning it into compost #11!
Its hard to believe that in less than a year (only by a few days) we have successfully completed and used 10 rounds of compost in the garden. This is really exciting stuff. I’ve learned a few things along the way I thought I might share… #1. Avocado seeds and skin are not worth the wait. #2. You really can keep the smell down considerably by omitting Dairy, Oil and Meat, #3. Kids love worms and #4. Composting your own rubbish really will save you time, energy and money.
Have I told you before? I LOVE Dirt!!!
THIS WEEK – The weather has dipped back down into the low 60’s and high 30’s at night around here… I’m not sure how much gardening I’ll be doing, but check back for some exciting posts on motherhood in the garden and some other personal anacdotes!
Is that a bulb in your pocket or are you happy to see me?
Posted: February 26, 2012 Filed under: diy garden, garden, Growing Vegetables, Landscaping, Personal, Uncategorized | Tags: Bulbs, Desert, Forced Bulbs, Gadzuki, Gardening, Jesse Amoroso, Las Vegas, roxie amoroso Leave a commentWith Spring having sprung a little early here (in Las Vegas) we still have quite a few pots of flowers around our house from forced bulbs (i.e bulbs tricked into thinking its spring so that they will flower in winter.) The following is a post that began back in January and is being finished now with a spectacular “AFTER” photo. Enjoy!
January 5th, 2012 – Being the lazy animal that I was all of Fall, we’re only now getting our onion bulbs in the ground. I think they’ll be okay as we line the outside of the garden that we used last season for tomatoes. I had some green onions last year that grew well out of the direct sunlight, shield by our mountain of egg plants.
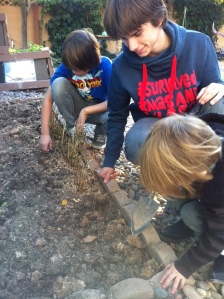
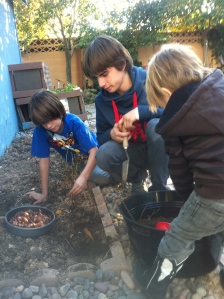
HOW TO PLANT BULBS FOR SPRING!
Step one – Clear the bed.
This happened the other day when Gadzuki and I tore through a bush of dried and died tomato plants. You can see that we’ve left the basil behind because (as its not perennial) we let it go to flower last year so that it would drop seeds and come back in spring.
Step two – Dig a hole.
The typical distance that the bulb should be planted is 6 inches. Im not much for “exacts” (which is why if you find me in the kitchen baking ANYTHING not out of a box, its usually against my will.) So we just use the distance of the spade on a typical hand held garden trowel.
Step three – Place the bulb
Now this is important… especially when your helpers are of the “under 15 set”. Place the bulb POINTY side up, i know no better way to describe this. Its pointy… like a little gnome hat.
Step four – Cover
Fill the hole up with dirt. Only instead of using the same dirt we dug out, I like to replace it with some of our premium composted mulch!
Step five – Lather, Rinse, Repeat
Step six – Water the ground and kiss your kids (it also helps to take them somewhere fun.)
You’re going to want to keep the troops happy, so that they keep helping with the manual labor.
Now wait and wait and wait and wait. Oh and try to remember where you’ve planted the bulbs so that you don’t dig them up later when adding to the garden. Some people like to plant a small annual flower on top to mark its spot… but I’m just going to remember that they are lining our bed and plant the tomatoes dead center when the time comes.
UPDATE – February 25th 2012
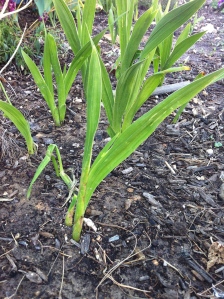
Here are some bulbs growing up out of the soil.
NEXT UP! A Year in the Sh*T! An updated blog about the trials and tribulations of my first year composting. Look for that tomorrow February 27, 2012.
One time… a car drove through my flower garden and parked in my living room.
Posted: December 28, 2011 Filed under: diy garden, garden, Growing Flowers, Growing Vegetables, Landscaping, Opinion, Personal, Thoughts on gardening, Uncategorized | Tags: accident, allergies, australian fern, car chase, Cowtown Guitars, cucumber, DIY, dumpster dive, flower garden, Gadzuki, Gardening, honey dos, husband, Jesse Amoroso, landscaping, Las Vegas, lattice, Metro, peppers, Plant World, potted plants, recycle, repurposing, reuse, roxie amoroso, Seven Magazine, spray paint, Squash, trailer park, Vintage Guitars, yard work, zucchini 2 Comments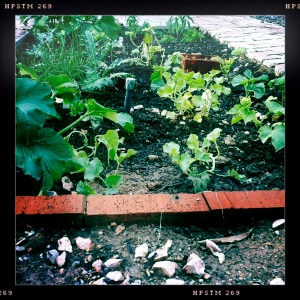
I’ll preface this by saying I’m trying to make this sound more like a story than an excuse… but its kind of hard.
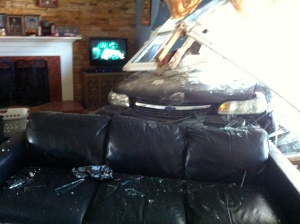
The fact is, it is an excuse. If I were a different kind of person I might have kept gardening after a car drove through my flower garden, and into the living room… but the fact is I gave up. On June 4th, 2011 a couple of drunk teenagers with a BB guns, joy riding in their parents Chevy Malibu were chased by the cops into our neighborhood… it ended in our living room. The driver was arrested, but we were left with a massive hole in the side of our home and I guess now that I’m actually taking time to write about it… our hearts too.
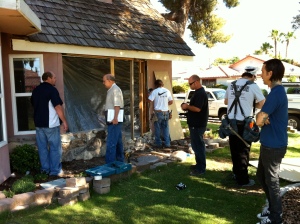
We were very lucky that no one was hurt. The big boys were at their Grandma’s house and none of the neighborhood kids happened to be playing on the corner (a RARE day!) Our incredible friends and neighbors came over immediately and spent hours helping us clean. We weren’t the only ones amazed when the house was livable at the end of the night. Here is a clip from the news if you want to see it.
After the former wall was removed and our house was successfully boarded up I did spend a couple days transferring the plants from my demolished garden into the backyard. Here’s a photo:
The new spot in the backyard is now called “the salvage garden”, it made it through the summer heat and is now thriving. But after seeing my little flower garden, my first attempt at gardening in our new home, my baby really… completely demolished and subsequently stomped on day after day by “constructors” (as Gadzuki called them). I really did lose my steam. I quit.
I continued doing the bare minimum and managed to keep the gardens in the backyard alive through the long summer, but didn’t touch the front. After 3 months of construction, buying a new business with my husband and the kids back in school I was finally able to look at that little space again without feeling sad. I’m no psychologist but I’m pretty sure it wasn’t just the superficial loss of my flower garden that was the problem. Maybe it was what all of those dead flowers represented. The truth is It could have been me, more easily could have been my husband (who was sitting in the living room when the car hit) and the worst thing of all… The most horrible thing a mother could ever think of; it could have been my baby. Gadzuki. Who was sleeping on the couch, under that window, just minutes before THOSE kids, drove THAT car across my lawn, through my garden and into my living room.
In the end I guess it helped me put things in perspective… I was spending 8 hours a day gardening and blogging before the accident. Afterwards my priorities shifted and all I wanted to do was spend time with my family. I needed to keep Jesse & Gadzuki where I could see them, and as luck would have it I was able to all summer!
2 weeks after construction started we bought a guitar shop, http://www.cowtownguitars.com for those interested. In a funny twist of fate I was able to keep them by my side and in my line of sight all summer long as we worked together in our new shop.
So as we get ready to welcome 2012, I’d just like to say that I’m back (and I’ve got the leaves and dirt in my hair to prove it). Today I turned composts #’s 7 & 8, tore out tomatoes/eggplants and added some brown matter to the old beds. The next couple weeks we’ll be busy getting three new raised beds installed before spring and before long we’ll be starting seeds in the garage! Thanks for reading and I can’t wait to share with you all of my trails and tribulations of the next growing season here at the Hotel Amoroso!
Happy New Year!
Next time: we’ll revisit the old compost pile and hopefully teach (and document) a friend as she starts her own!!
Compost – Then & Now
Posted: May 5, 2011 Filed under: Uncategorized 2 CommentsI love to talk about it, read about it, work on it, add to it, take pictures of it, smell it and play with it.
Typing that a few months ago, I could have only been talking about one thing… Gadzuki. My 2 year old son, the light of my life. And then I started composting…
The only thing I love more than my compost is people. Its a bold statement… but true. Its my most coveted material possession and I look forward to checking in on it every day. Its complex texture, odor and usefulness mystify me like nothing else does. If anything, I probably fiddle with it too much.
I’m not sure what it is about the black gold that gets such a hold on people, but its not only me. Talk to anyone with a passion for gardening and I’m certain you’ll notice a little twinkle in their eye when you mention compost.
Here’s what mine looked like when we started the compost “pile” back in March. Click here to read about how my genius kid came up with the idea. I’m happy to report that in just 2 months we are already using the compost that you see above as beautiful mulch for the tomato plants!
We started the 2nd bin about 2 weeks ago. You can see the difference in color alone, but if this wasn’t the internet you could smell the amazing earthy scent and feel the fine crumbly goodness that only comes with 60 days of turning, adding and watering a pile of what some might just look at as trash!
We started the 2nd bin in much the same way we did the first. With the exception of the enormous amount of spent coffee that Hank brought me from the Beat Coffee shop (Thanks!!). Combined with the “Browns” I’ve been saving up from all over the yard in this handy garbage can I keep out by the compost bin. It makes it especially convenient for when I’m trying to balance the levels.
Since we planted sod and reseeded another area of the backyard we had a lot of fresh grass clippings too. The only other thing that was added besides water were the usual kitchen scraps… although with the yard looking so amazing, we have been partying quite a bit! (so there may have been a bit more than usual).
And so… after a couple weeks, we were really excited to take the new composts temperature and I couldn’t believe my eyes when it skyrocketed to 120 degrees!!
http://www.facebook.com/v/1866376393111
Click here to see the video!
This is where I go in my dreams…
Posted: April 21, 2011 Filed under: diy garden, Thoughts on gardening, Uncategorized | Tags: Gadzuki, Gardening, maple town, minature, oleander tree, olive trees, roxie amoroso, wee garden Leave a commentThe trees are making us sick. I’ve been told by a friend that it should pass in a couple weeks. I hope so. The culprits are the Oleander & Olive trees and they are all over our property. Next year we’ll get the injections that stop the Olives from producing… until then, we suffer.
So from the luxury of my air conditioned bedroom, While Gib & I watch cartoons… here is a site we like to go to. He likes pointing out all that he sees (like a web version of an I spy book) and something about the “Wee Gardens” takes me back to when I was little and played with my Maple Town figures in the wild & crazy backyard we had in Paradise, California.
Here’s the link: http://www.weegarden.com
Hopefully we’ll be back in the garden tomorrow for the holiday, but then again… everyday is Earth Day around here.
Part #2 – Natures Flooring!
Posted: April 19, 2011 Filed under: diy garden, Landscaping, Personal, Uncategorized | Tags: Cabana, DIY Gardening, grass, growing grass, Jesse Amoroso, Las Vegas, pool, roxie amoroso, seed, Sod, Star Nursery 2 CommentsMy yard is large. I’m not sure what the square footage is, but after looking at many a suburban home in our quest for the perfect house, I know its not average. On top of its size, its dead. Or it was, rather.
One year into the search, we found the house of our dreams. The good news? It was it was in our price range. The bad news? The only reason: It was a foreclosure and over a year of vacancy had turned a once beautiful landscape into a pitiful Vegas wasteland.
Even though we’ve been steady fixing, cleaning and planting since we moved in last August, this was the first area we decided to focus on entirely. The “Cabana” I call it! I wanted it for my birthday (April 24th), and my husband being the tolerant man he is, agreed to get involved.
First things first, the empty planter (yesterdays post “Part #1 – Geophytes for fun!) and the miserable little chuck of dead lawn had to be dealt with. So here’s how we finally got grass, man…
BEFORE:

Part #2 – Natures Flooring!

Star Nursery has the Sod for $0.45/sq ft. One time when Jess and I were young and dumb we snagged roughly the same amount from a place by our rehearsal space… we brought it home and laid it in the backyard in the middle of the night. We really felt like we scored, surely it was worth a lot of money. Only rich people SOD their yards… the rest of us struggle with seed and and manure and birds and disappointment.
Well we were 9 years later we learned we were WRONG. After a grand total investment of $38 the jeep was filled with green lush grass… even if it was only enough for a 9 x 9 area. Oh and consequently, that sod we planted in the dead of night died. Kharmas a bitch.
And this is how you can plant sod too:
Step #1: Make your kids help. Give them shovels, rakes, hoes (ha! we’re a little close to the strip for that!) and turn them loose. They broke up and removed all of the dead grass. Being careful of the sprinkler (its worth its weight in gold in this remote section of the yard) and added some of it to my new compost pile.
Step #2: Fertilize the soil
Step #3: Lay it down like your laying out quilting squares… or at least thats what it looked like to me.
Step #4: Gently cut the sections of grass to fit in your area with a steak knife. Yep, I saw it with my own eyes. That was the fanciest tool they used in the whole process.
Step #5: Water, drench, drown, submerge, soak, shower, douse, bathe, ect… basically any word that describes keeping it as wet as possible for as long as possible. Or at least two weeks.
Oh, and lastly… TRY to keep your two year old from riding his “motorcycle” on it.
Tomorrow: we take a look at what finally became my own little piece of paradise in our backyard.
Also check out the updated photo on Part #1

